
|
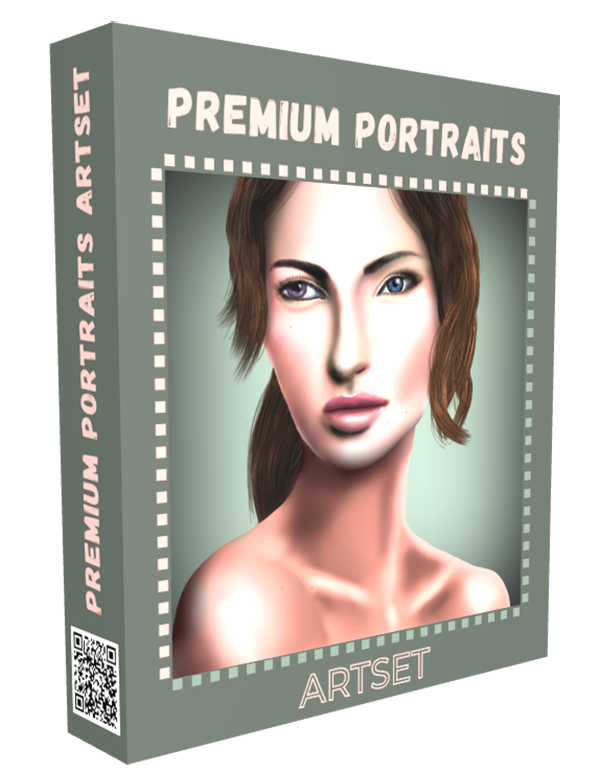
NEW PREMIUM PORTRAITS ARTSET ✔ A Specialized collection of brushes for making photo realistic artistic portraits ✔ 48 unique brushes, including: ✔ 4 liquid modeling brushes for shaping ✔ 3 brushes for painting eyes, lashes and eyebrows ✔ 3 brushes for painting hair ✔ A beard brush ✔ 3 brushes for aiding in adding realistic skin textures and color ✔ 1 silky smooth shading brush ✔ And more!
|
Premium Design Explorer Artset
The Premium - Portraits ArtSet contains a specialized collection of brushes for making photo realistic artistic portraits. These brushes are hand-crafted to make the process of portraiture easier and of a higher quality. The full range of brushes needed are in this collection, including, liquid brushes for modeling and shaping the face, neck and shoulders, powerful single click eye brush with tons of adjustability, flexible brushes for hair and beards, shading, blending, painting, pre-selected colors even brushes for eyelashes and eyebrows.
The Premium - Portraits ArtSet contains a specialized collection of brushes for making photo realistic artistic portraits. These brushes are hand-crafted to make the process of portraiture easier and of a higher quality. The full range of brushes needed are in this collection, including, liquid brushes for modeling and shaping the face, neck and shoulders, powerful single click eye brush with tons of adjustability, flexible brushes for hair and beards, shading, blending, painting, pre-selected colors even brushes for eyelashes and eyebrows.
|
Overview
Premium - Portraits ArtSet with 48 new brushes designed for portrait painting including:
|
|
- 3 different blending brushes and soft blending is a standard in photo realistic artistic portraits
- 3 photo processing brushes for colorizing, lightening and darkening
- 1 filter brush for a single click perfect vignette background every time
- 20 color brushes for skin, eyes, hair and lips for a total of 80 custom colors
|
Included Brushes
1. Modeler: Add 2. Modeler: Sub 3. Modeler: Shaper 4. Modeler: Smoothing 5. Eye 6. Eyelash 7. Eyebrow 8. Hair 9. Hair Wiry 10. Hair Strands 11. Beard 12. Skin Fine Texture 13. Skin Freckles 14. Skin Blemish 15. Shader 16. Soft Paint 17. Paint 18. Smooth Pen 19. Detailer 20. Soft Eraser |
21. Eraser 22. Smudger 23. Soften 24. Mixer 25. Colorize 26. Lighten 27. Darken 28. Process: Vignette 29. Skin Tone: Fair 1 30. Skin Tone: Fair 2 31. Skin Tone: Medium 1 32. Skin Tone: Medium 2 33. Skin Tone: Olive 1 34. Skin Tone: Olive 2 35. Skin Tone: Deep 1 36. Skin Tone: Deep 2 37. Eye Color: Blue 38. Eye Color: Gray/Green 39. Eye Color: Brown 40. Eye Color: Rare |
41. Hair Color: Blond 1 42. Hair Color: Blond 2 43. Hair Color: Brunette 1 44. Hair Color: Brunette 2 45. Hair Color: Red 1 46. Hair Color: Red 2 47. Lip Color: 1 48. Lip Color: 2 |
This product is compatible only with the following products:
- TwistedBrush Pro Studio version 25.17 or later
- Paint Studio version 4.17 or later
Installation Instructions
How to Use (General Tutorial)
The usage of the brushes in this ArtSet collection will vary from user to user, depending on skill set and goals. The usage below is targeted for the artist who uses a reference photo for the portrait work.
Setup Reference Material
The steps in this section are optional, all or none of them may be used, however, they each have their value.
- Resize (usually smaller) to the same you want to work with
- Crop as desired
- Use menu: Page | Set Page as Clone / Tracing Source
- Switch to the next page in the book, page down key.
- Ensure the page size is the same, use the menu Page | Set Page Size to Previous Page Size.
- Note: This is useful to toggle on and off with the hotkey ‘t’ to get an overlay of the actual photo on your canvas.
- Use menu: Page | Set as Reference Image
- Note: The reference image has two primary benefits. It is always visible for reference and clicking on the reference image will select a color.
- Hint: resize the reference image window to increase or decrease the size.
- Hint: right click in the reference image to zoom in and out.
- Switch back to your working page and on a layer above paste the image. Ctrl + v
- Set the layer mix mode to Multiply
- Use the Edge 4 filter (Edge 5 or Edge 6) to create an outline. Menu Filters | Stylize | Edge 4.
- Note: all your work will be on layers lower than this. Toggle the visibility of the layer as needed.
- Hint: This is most helpful in the early stages of the painting to get proportions correct.
Layer OrganizationThe following layer organization is just a guideline, as are most of the steps in this guide. Listed in the order that they appear in the program, with the top most layer listed first to the background listed last.
● Outline Layer: The outline reference if used.
● Foreground Hair Layer: The bulk of the hair will be on this layer.
● Face Layer: All the facial features, except eyes, which appear below.
● Eyes Layer: For the actual orbital eye.
● Neck and shoulders Layer: Neck, shoulders, and upper chest.
● Background Hair Layer: Hair that is behind the neck and shoulders.
● Background Layer: Background color, gradient or vignette.
Basic ShapeFor the basic shapes for the head, neck and shoulders, the 4 Modeler brushes are excellent. These brushes invoke the liquid paint system which allows for modeling a silhouette. This silhouette will always have crisp lines and can be shaped, smoothed, holes punched in it and also will act as a surface that can be painted on without worry of paint on the non-silhouette part of the layer.
● Head
○ Switch to the Head layer
○ Select the Modeler: Add brush
○ Use the Trace feature and / or enable the outline reference.
○ Paint to create the basic shape of the head.
■ Note: on the first stroke, a message box will appear asking if the layer should be converted to a Liquid paint layer. Click the Yes button.
○ Use the Modeler: Sub brush to remove large parts and the punch slits in the shape of the eyes.
■ Note: only the orbital (eyeball) will appear on the layer below. The eyelids will be on this Head layer.
○ Use the Modeler: Shaper brush to push, pull and shape the head until it is correct
○ Use the Modeler: Smoother brush to smooth out the edges.
○ Hint: Hide and show the trace and outline from time to time during this process to check your progress.
● Neck and Shoulders
○ Switch to the Neck and Shoulders layer
○ Follow the same basic process as used for the Head.
Base Colors ● Once the basic head, neck and shoulders are modeled, it is useful to paint the basic skin tone.
○ This could be a single color for all, or blocking in areas of different colors can be done.
○ The Soft Paint or Paint brush works well for this.
○ Hint: Use a larger brush size and don’t worry about shading or facial features, this is to just set a base color.
● Note: There are multiple options for selecting colors, including:
○ Set colors into your brush by selecting one of the Skin Tone color brushes from the Portraits ArtSet.
○ Clicking in the reference image will select a color
○ Selecting and adjusting colors from the color palettes.
Basic Facial Features ● Eyes
○ Note: the Eye brush is a brush with a single click that will generate a complete eye. Of course, you can manually paint the eyes yourself if you would rather.
○ This assumes the head layer has slits for the eyes
○ Switch to the Eyes layer
○ Select the Eye brush
○ Select the color for the eye
■ Hint: Selecting the colors from the Premium - Portrait ArtSet will only update the colors for your brush, and not change your currently selected brush.
○ Adjust the size as needed.
○ Note: The Eye brush has a huge assortment of adjustments in the Brush Control panel. It’s recommended to try to default values first and then adjust as needed.
○ Position your brush with the circle outline generally centered over the visible eye slits from the Head layer and click to place each eye.
■ The eye should appear visible through eye slits
● Around Eyes, Nose, Mouth, Ears
○ The Shader, Soft Paint and Soften brushes work well for forming the facial features.
○ The Shader and Soft Paint brushes apply paint and therefore select the proper color is important.
○ The Soften brush is a blender and therefore blends existing colors.
○ Hint: Selecting colors from the reference image is helpful.
○ Hint: When working on liquid layers (Head Layer and Neck and Shoulders layer) the painting is only possible on the silhouette.
Shading ● Face, Neck and Shoulders
○ The Shader, Soft Paint and Soften brushes work well for overall shading.
○ The Shader and Soft Paint brushes apply paint and therefore select the proper color is important.
○ The Soften brush is a blender and therefore blends existing colors.
○ Hint: Selecting colors from the reference image is helpful.
○ Hint: When working on liquid layers (Head Layer and Neck and Shoulders layer) the painting is only possible on the silhouette.
Hair ● In Front of Head, Neck and Shoulders
○ Switch to the Foreground Hair Layer
○ Use the Hair brush
○ Select the color for the hair
■ The Portraits ArtSet includes a variety of hair colors or select from the reference image or select a color from the color palette.
○ Note: the Hair brush is designed to be used to layer hair on the page using full strokes. Using full strokes will allow the proper tapering to occur. Overlap the strokes for best results.
● Behind Head, Neck and Shoulders
○ Switch to the Foreground Hair Layer
○ Use the Hair brush
○ Select the color for the hair
■ The Portraits ArtSet includes a variety of hair colors or select from the reference image or select a color from the color palette.
○ Note: the Hair brush is designed to be used to layer hair on the page using full strokes. Using full strokes will allow the proper tapering to occur. Overlap the strokes for best results.
Facial Hair ● Eyelashes
○ Use the Eyelash brush
● Eyebrows
○ Use the Eyebrow brush
● Beards and Mustaches
○ Use the Beard brush
■ Hint: usage is similar to that of the Hair brush described in an earlier section.
Skin Texture and ColorizationThere are 3 brushes included for skin texture. These brushes all work with existing colors on the page therefore color selection isn’t needed.
● Skin Textures
○ Use the Skin Fine Texture brush
● Freckles
○ Use the Skin Freckles brush
● Blemishes
○ Use the Skin Blemish brush
Background ● Switch to the background layer
● Select the Process: Vignette brush
● Select a desired color for the background
● Click once on the page to have your vignette background painted for you
Legal Agreement
- Download the Artset ZIP file
- Unzip the Artset somewhere
- To Import the Artset, use the menu File -> Import ArtSet and select the .pre file to import it. It should copy it to the right place.
- Click on any brush slot in the Brush Shortcuts panel to open the Select Brush dialog box.
- The ArtSet will appear in a Premium category at the top of the ArtSet list.
How to Use (General Tutorial)
The usage of the brushes in this ArtSet collection will vary from user to user, depending on skill set and goals. The usage below is targeted for the artist who uses a reference photo for the portrait work.
Setup Reference Material
The steps in this section are optional, all or none of them may be used, however, they each have their value.
- Load photo
- Resize (usually smaller) to the same you want to work with
- Crop as desired
- Setup Trace
- Use menu: Page | Set Page as Clone / Tracing Source
- Switch to the next page in the book, page down key.
- Ensure the page size is the same, use the menu Page | Set Page Size to Previous Page Size.
- Note: This is useful to toggle on and off with the hotkey ‘t’ to get an overlay of the actual photo on your canvas.
- Setup Reference Image
- Use menu: Page | Set as Reference Image
- Note: The reference image has two primary benefits. It is always visible for reference and clicking on the reference image will select a color.
- Hint: resize the reference image window to increase or decrease the size.
- Hint: right click in the reference image to zoom in and out.
- Setup Outline
- Switch back to your working page and on a layer above paste the image. Ctrl + v
- Set the layer mix mode to Multiply
- Use the Edge 4 filter (Edge 5 or Edge 6) to create an outline. Menu Filters | Stylize | Edge 4.
- Note: all your work will be on layers lower than this. Toggle the visibility of the layer as needed.
- Hint: This is most helpful in the early stages of the painting to get proportions correct.
Layer OrganizationThe following layer organization is just a guideline, as are most of the steps in this guide. Listed in the order that they appear in the program, with the top most layer listed first to the background listed last.
● Outline Layer: The outline reference if used.
● Foreground Hair Layer: The bulk of the hair will be on this layer.
● Face Layer: All the facial features, except eyes, which appear below.
● Eyes Layer: For the actual orbital eye.
● Neck and shoulders Layer: Neck, shoulders, and upper chest.
● Background Hair Layer: Hair that is behind the neck and shoulders.
● Background Layer: Background color, gradient or vignette.
Basic ShapeFor the basic shapes for the head, neck and shoulders, the 4 Modeler brushes are excellent. These brushes invoke the liquid paint system which allows for modeling a silhouette. This silhouette will always have crisp lines and can be shaped, smoothed, holes punched in it and also will act as a surface that can be painted on without worry of paint on the non-silhouette part of the layer.
● Head
○ Switch to the Head layer
○ Select the Modeler: Add brush
○ Use the Trace feature and / or enable the outline reference.
○ Paint to create the basic shape of the head.
■ Note: on the first stroke, a message box will appear asking if the layer should be converted to a Liquid paint layer. Click the Yes button.
○ Use the Modeler: Sub brush to remove large parts and the punch slits in the shape of the eyes.
■ Note: only the orbital (eyeball) will appear on the layer below. The eyelids will be on this Head layer.
○ Use the Modeler: Shaper brush to push, pull and shape the head until it is correct
○ Use the Modeler: Smoother brush to smooth out the edges.
○ Hint: Hide and show the trace and outline from time to time during this process to check your progress.
● Neck and Shoulders
○ Switch to the Neck and Shoulders layer
○ Follow the same basic process as used for the Head.
Base Colors ● Once the basic head, neck and shoulders are modeled, it is useful to paint the basic skin tone.
○ This could be a single color for all, or blocking in areas of different colors can be done.
○ The Soft Paint or Paint brush works well for this.
○ Hint: Use a larger brush size and don’t worry about shading or facial features, this is to just set a base color.
● Note: There are multiple options for selecting colors, including:
○ Set colors into your brush by selecting one of the Skin Tone color brushes from the Portraits ArtSet.
○ Clicking in the reference image will select a color
○ Selecting and adjusting colors from the color palettes.
Basic Facial Features ● Eyes
○ Note: the Eye brush is a brush with a single click that will generate a complete eye. Of course, you can manually paint the eyes yourself if you would rather.
○ This assumes the head layer has slits for the eyes
○ Switch to the Eyes layer
○ Select the Eye brush
○ Select the color for the eye
■ Hint: Selecting the colors from the Premium - Portrait ArtSet will only update the colors for your brush, and not change your currently selected brush.
○ Adjust the size as needed.
○ Note: The Eye brush has a huge assortment of adjustments in the Brush Control panel. It’s recommended to try to default values first and then adjust as needed.
○ Position your brush with the circle outline generally centered over the visible eye slits from the Head layer and click to place each eye.
■ The eye should appear visible through eye slits
● Around Eyes, Nose, Mouth, Ears
○ The Shader, Soft Paint and Soften brushes work well for forming the facial features.
○ The Shader and Soft Paint brushes apply paint and therefore select the proper color is important.
○ The Soften brush is a blender and therefore blends existing colors.
○ Hint: Selecting colors from the reference image is helpful.
○ Hint: When working on liquid layers (Head Layer and Neck and Shoulders layer) the painting is only possible on the silhouette.
Shading ● Face, Neck and Shoulders
○ The Shader, Soft Paint and Soften brushes work well for overall shading.
○ The Shader and Soft Paint brushes apply paint and therefore select the proper color is important.
○ The Soften brush is a blender and therefore blends existing colors.
○ Hint: Selecting colors from the reference image is helpful.
○ Hint: When working on liquid layers (Head Layer and Neck and Shoulders layer) the painting is only possible on the silhouette.
Hair ● In Front of Head, Neck and Shoulders
○ Switch to the Foreground Hair Layer
○ Use the Hair brush
○ Select the color for the hair
■ The Portraits ArtSet includes a variety of hair colors or select from the reference image or select a color from the color palette.
○ Note: the Hair brush is designed to be used to layer hair on the page using full strokes. Using full strokes will allow the proper tapering to occur. Overlap the strokes for best results.
● Behind Head, Neck and Shoulders
○ Switch to the Foreground Hair Layer
○ Use the Hair brush
○ Select the color for the hair
■ The Portraits ArtSet includes a variety of hair colors or select from the reference image or select a color from the color palette.
○ Note: the Hair brush is designed to be used to layer hair on the page using full strokes. Using full strokes will allow the proper tapering to occur. Overlap the strokes for best results.
Facial Hair ● Eyelashes
○ Use the Eyelash brush
● Eyebrows
○ Use the Eyebrow brush
● Beards and Mustaches
○ Use the Beard brush
■ Hint: usage is similar to that of the Hair brush described in an earlier section.
Skin Texture and ColorizationThere are 3 brushes included for skin texture. These brushes all work with existing colors on the page therefore color selection isn’t needed.
● Skin Textures
○ Use the Skin Fine Texture brush
● Freckles
○ Use the Skin Freckles brush
● Blemishes
○ Use the Skin Blemish brush
Background ● Switch to the background layer
● Select the Process: Vignette brush
● Select a desired color for the background
● Click once on the page to have your vignette background painted for you
Legal Agreement
Other Products From Pixarra
TwistedBrush Pro Studio Unlimited Digital Art |
Paint Studio Natural Media Painting |

|

|

|
Other Products From Pixarra
|
|

|

Studio Bundle Collection of Art Software |